
The Craftsy class was well worth the money. It was a great class and Gertie was a fantastic instructor, which was not surprising. It was not a fast process, but very thorough and very informative. The only gripe I had about the interactive platform is I felt there was a substantial amount of lag time between questions from students and answers from Gertie herself. I know she is only human and everyone's lives get busy, and perhaps it was only during the time when I took the course. Maybe now it is different. Honestly, it still wouldn't keep me from recommending the course to anyone. I know I already said it, but it was a great class!
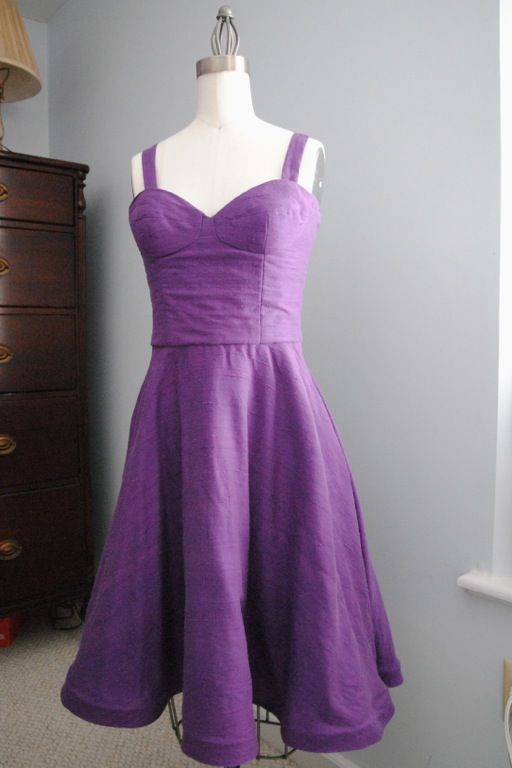
The original pattern, from BurdaStyle, has a draped front slim skirt that I chose not to use. Instead I used the BurdaStyle Linda skirt, which is a simple circle skirt, and attached at the waist seam. I probably could have drafted my own, but this pattern was suggested by Gertie to use, so I did. It seemed the wisest thing to do to keep any mistakes at a minimum. I used a dupioni silk that I had to dye the right shade of purple. Dyeing silk had its own learning curve.

The original swatch of silk
Since I am not a super busty person, I added more padding to the bust post-finishing the dress, which I have since removed. Good thing it was there, because holy....cow! Look what I found when I went to take photos this morning:

Crazy, right?
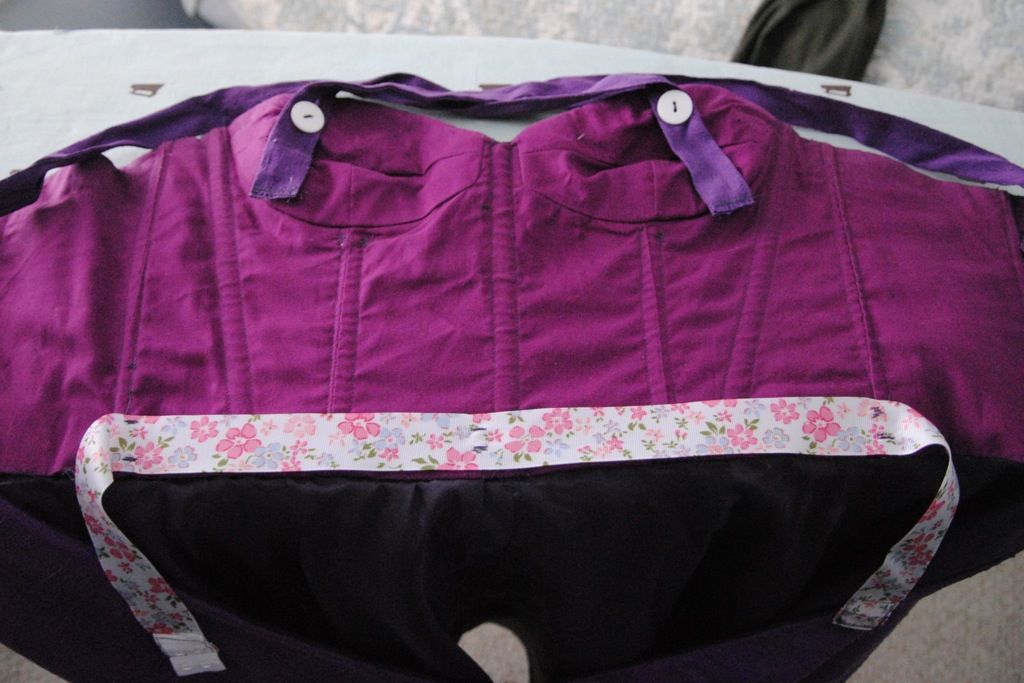
And....anyway. As to the inner parts of the dress, you can see I lined in cotton, but it is underlined with muslin as well. The boning is spiral steel boning, which was the first time I had ever worked with it. It sounds more difficult than it really was. And it really made the dress feel solid and sturdy, in a good way. Even though there are three layers (and boning) in this dress, it was still surprisingly comfortable and light to wear. The waist-stay, the floral ribbon in the pic above, which helps distribute the weight, was really helpful.
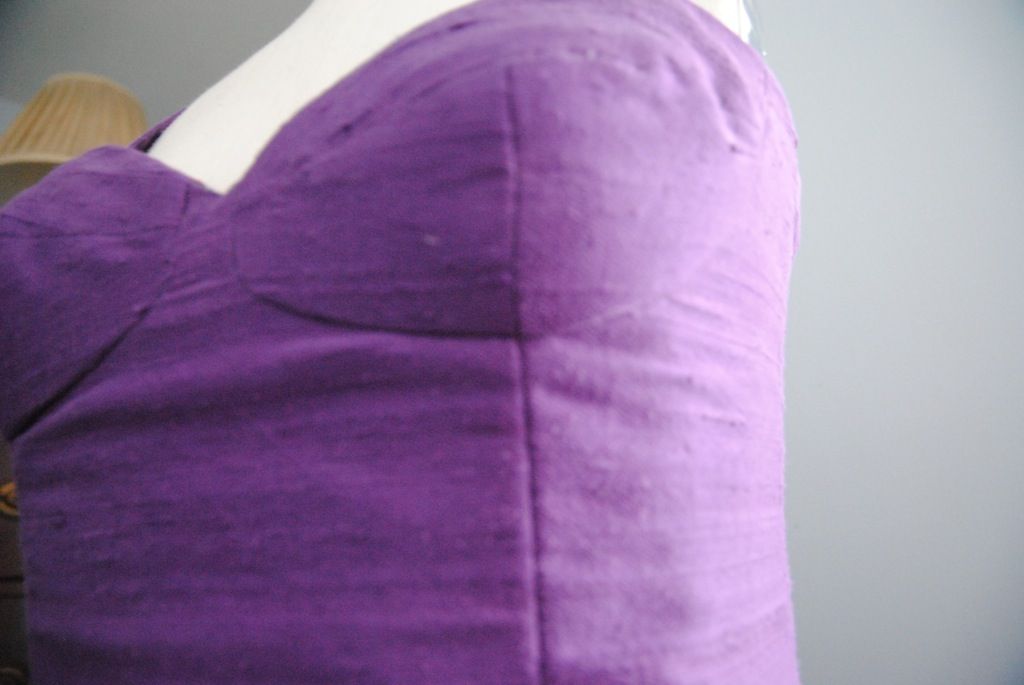
Sorry — weird angle, a little blurry, but look at my seam matching. That was the most difficult seam I have ever sewn!
The Linda skirt fit perfectly to the waist pattern and I think the end result really did look great. I ended up adding a lining for the skirt and in-seam pockets. Because all dresses should have pockets! As far as adjusting the bodice pattern, the only thing I had to do was to lower the waistline of the dress, which seemed a common alteration for the rest of the class as well. My straps were a bit closer-in than others, but that is what looked the best on my frame. As you can see from the inner pic above, they are removable.
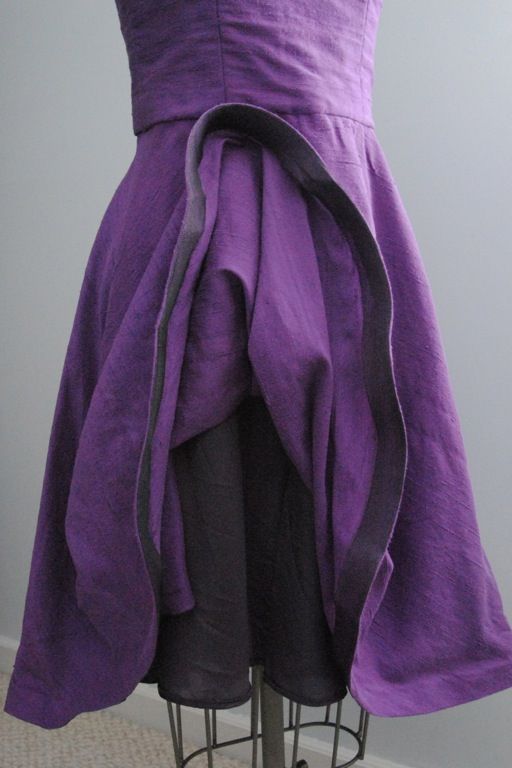
Skirt lining and horsehair hem
I added horsehair braid to the hem, which gave great body to the hem. The only thing I would suggest is to keep an eye on it, if you use it. My fabric was so light (or it was so delicate the braid would catch?) that it kept flipping up. There are about a dozen photos of me during the reception with just a few inches peeking up.
The last thing is the zipper. Ah, that...zipper. Instead of the lapped zipper, I went with an invisible zip. I know it isn't period correct, or an easier option but it was a last minute decision. Well, this decision would come to bite me in the butt. How? By constantly getting stuck at the same position every time I put the dress on. I think there were too many layers for the zipper to handle, or at least that is what I am sticking to! The day of the wedding, I thought I would have to go down the aisle like this:


So there it is! What do you think? Have you ever made a dress for a wedding?


What a lovely dress and that colour suits you perfectly. Yes, I did make a dress for a friend's wedding and it was the best thing I did.
ReplyDeleteThanks, Evelyne! I was unsure of the color for me after we dyed it, but it turned out great! I am sure that your dress was the hit of the wedding...besides the bride, of course ;)
DeleteI love your dress! Glad you got it zipped!!
ReplyDeleteThanks so much! It really was a delight to sew and wear. We all breathed a sigh of relief when we got it zipped :)
DeleteYour dress is beautiful! I love that color!!
ReplyDeleteThanks! That was not the color we had planned while doing our test dyeing, but it did turn out great!
DeleteThis is so gorgeous! I love it! You look amazing in the dress! But how stressful about the zipper?! Yikes! Glad everything worked out and you made it down the aisle OK. :)
ReplyDeleteI made bridesmaid dresses about a year ago for my sister's wedding, and it was so completely stressful. I made three of them, each from a different pattern, and it just took me way longer than I estimated it would, so I ended up sewing all night long the night before the wedding-- no fun! I was still really new at sewing then, so it was a bigger project than I had the chops for, but I learned lots in the process!
Holy cow! Three different dresses?!?! That is INSANE! Well, I am glad that it all came out well. What is a wedding with out at *least* one super-stressful moment ;)
DeleteBeautiful! I love dupioni silk and am planning to make a dress for my sister-in-law's summer wedding. If you ever need dupioni again, I recommend http://www.silkbaron.com/. The color selection is jaw dropping and the quality is excellent. With every order you also get 3 free swatches!
ReplyDeleteThanks for the link! I am always on the lookout for more fabric stores :) I loved working with dupioni, the only thing is that it frayed like crazy while I was working with it. But the end results are absolutely worth it!
Delete