
I have to break this dress down into two posts, otherwise it would be waaay too much for you all to read and for me to write. In this post I will solely focus on the first stages of making the dress, the muslins and adjustments.
This McCalls pattern is labeled "easy" and for some people it might have been great right out of the envelope. I was not so lucky. Nor do I make anything easy for myself. I have shown you some pictures of the original muslin on the dress form but here I will get into the nitty-gritty of it. If you don't care, come back tomorrow when I have the final post with finished pictures. It is okay. I don't mind. For those so are staying: Settle in, this is a long one :)
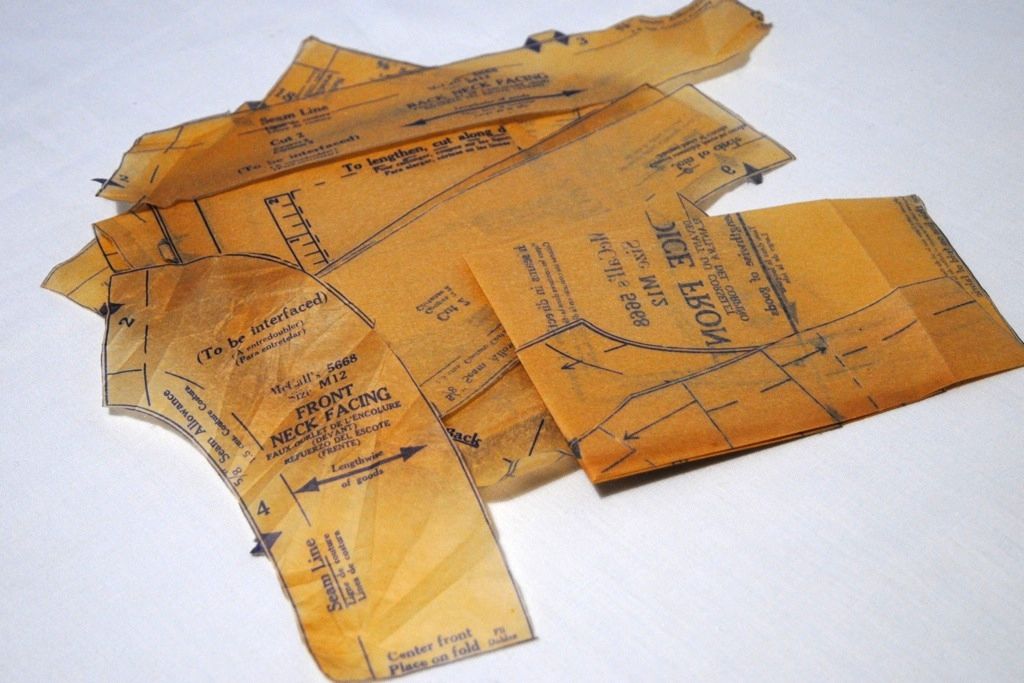
So first, as with all vintage patterns, I had to gently open up the pattern pieces, which had been in the same position for about sixty years (give or take a few) and try to get them flat. I ironed them on a low dry setting to get the creases out as best I could. After that I proceeded to trace the pattern onto this paper, which I use for all my pattern tracings. If you are in the market for something, my only gripe with this stuff is it tends to roll back into its tubular shape at all the wrong moments. Weights are needed.
Before I started the first muslin I only adjusted a few things on the traced pattern pieces before I actually started cutting fabric. I looked at the finished measurements and also did some flat measuring (which means measuring the actual pattern pieces) and compared them with my own measurements. (Hey, Laurel, aren't you proud!?!?) I realized that I needed to adjust the hips on the skirt and drastically reduce the length of the skirt. I ended up adding a 1/2" to the hips by slashing up from the hem to the waist seam line and spreading it out the desired width. I also took off 7"(!) off the skirt length. I did this adjustment in two different places on the skirt. I knew I might need a small bust adjustment, but decided for two reasons not to do so before the first muslin. First, I wanted to try it as is and see if it was just part of the design and second, I wasn't sure how to go about trying to make a small bust adjustment with this kind of bodice. Kimono sleeves, darts and too much surface area. So, I skipped it.
Here is a shot of the first muslin on me:

You can see the neck is way too high, and what I don't know that is obvious from this photo is that the there is a lot of excess fabric. Again, this style is supposed to be somewhat full, but in person it seemed to overwhelm my frame. And you can see that the midriff is way too low with all that fabric. Here is a shot of the adjusted pattern:
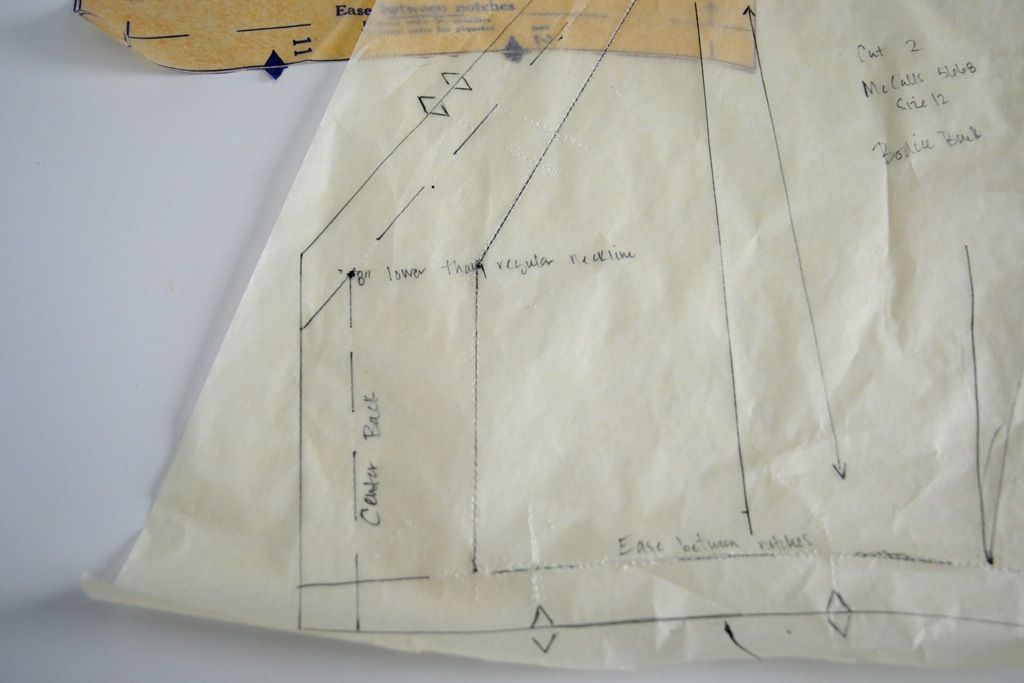
I ended up removing a wedge at the center front that was 1.5" (so a 3" total loss) and then redrew my center front. If you look closely, you will see that I when I redrew my center front I also lost a bit of the neckline. I could have added the amount back to the neckline seam at the shoulder to compensate, but since it seemed a bit wide, I left it as is. I also took out a small 1/4" wedge from the under arm seam to the shoulder seam as that is where there was a lot of excess fabric. In essence, I think I did some weird hybrid of a sba. It wasn't technical but again, worked. I also shaved a 1/4" off the shoulder seam, tapering to nothing at the top of the shoulder.
Here are some shots taken of the back of the first muslin:


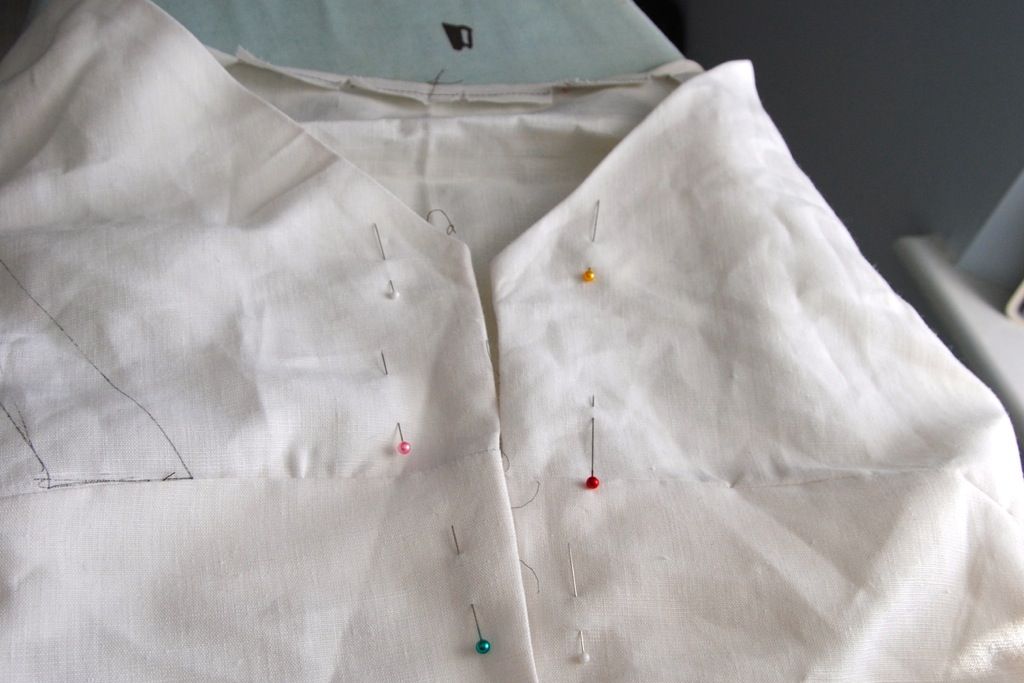
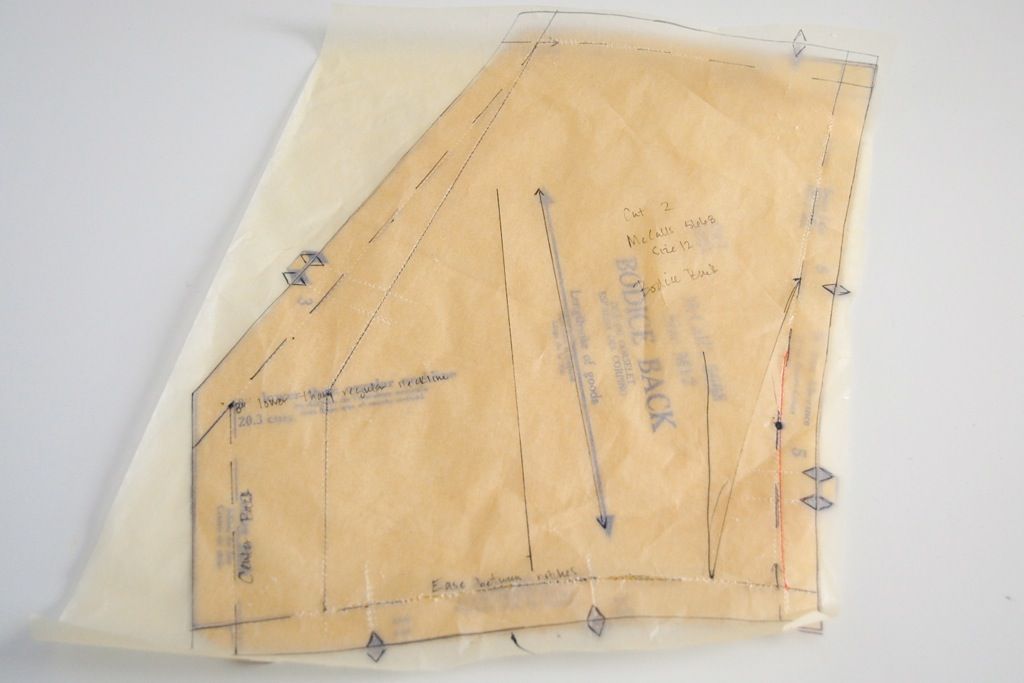
This is what I did for the back. I ended up removing fabric at the center back drawing a line from the top of the center back to the where the original V started, so that I wouldn't lose where it the V hit my back, which I liked. I redrew my grain line in line with the center back. I also had to add to the side seams of the midriff tapering up to the bodice seams. After the second muslin, I did end up adding another 1/2" total to the bodice side seams. Just enough to let me breathe normally :) Now, I don't know if this was the correct way of doing all of these adjustments, but it seemed to do the trick. If anyone has any better advice, I would happily receive it :)
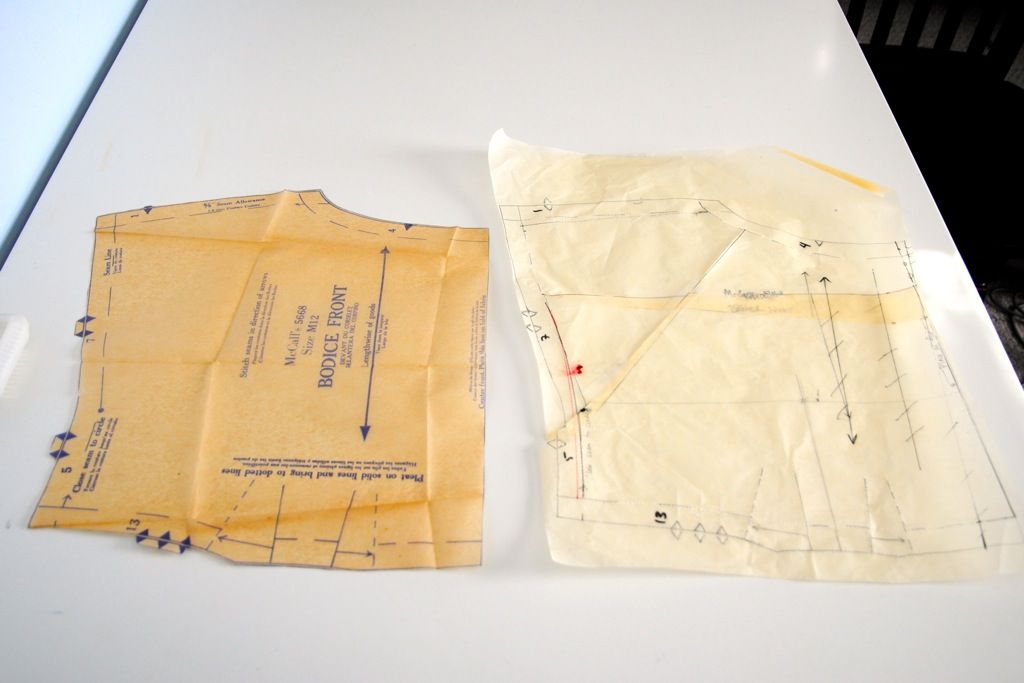
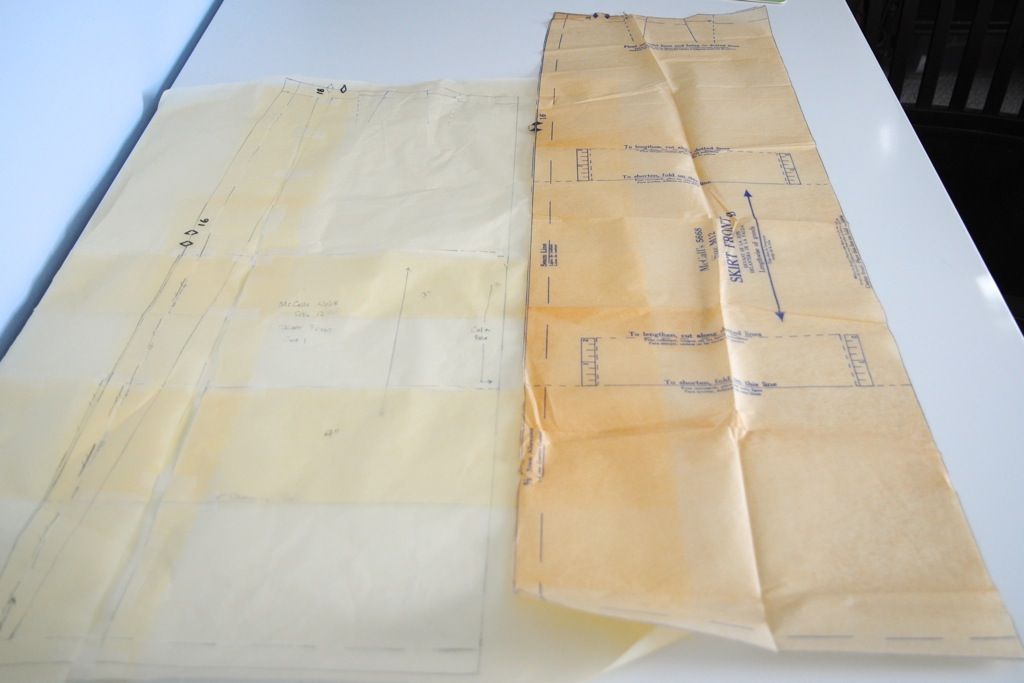
As for the skirt, besides the original hip adjustment there were only a few things after the first muslin. I ended up adding about an 1/8" to the back skirt panel only, right where my thighs are, um, the most....shapely. It was just enough to give me a little more room to sit and walk. I also added to the waist seam about 2". And finally I had to take off another 1/2" from the hem, which is still mind-boggling to me. That makes it a full 7.5" off that skirt! Here is a shot of the skirt next to the original:
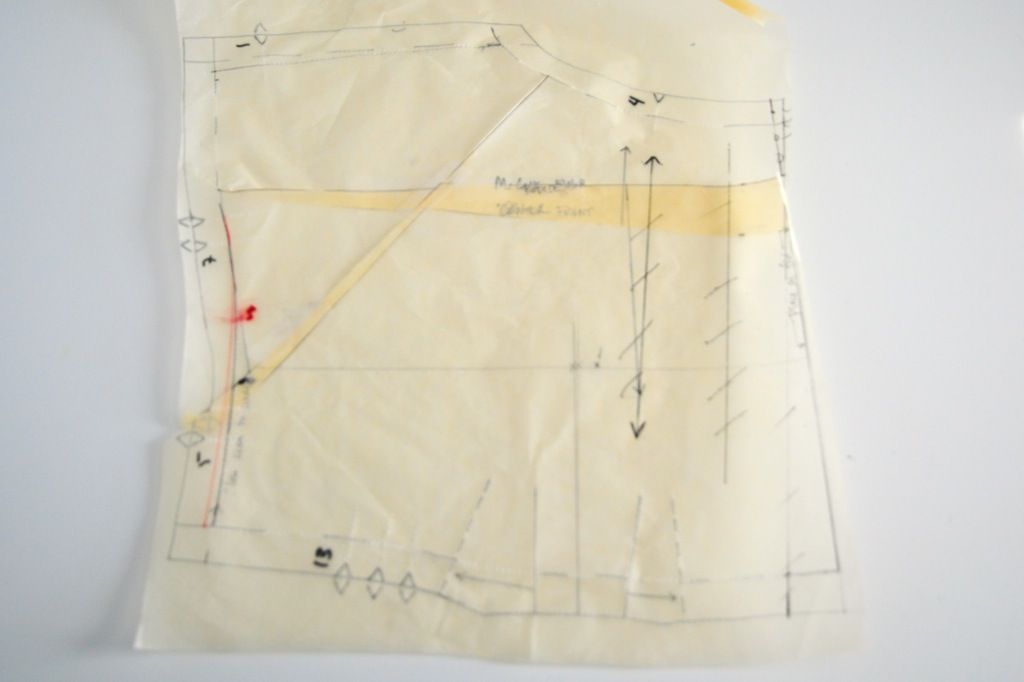
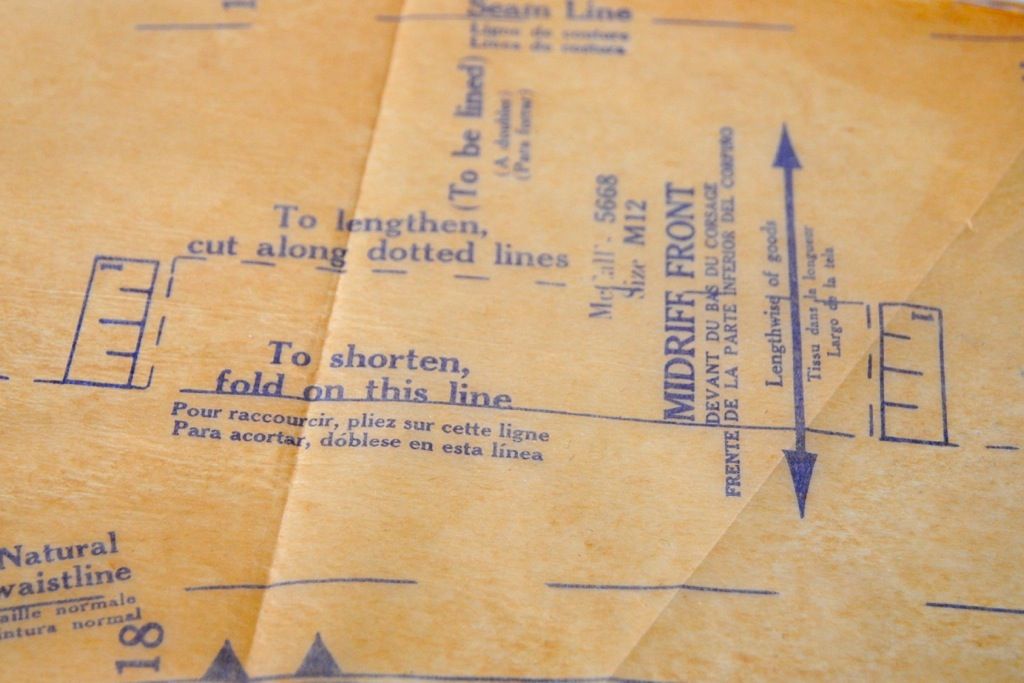
If you are still reading, this might be of interest to you. I had never seen it before, but the lengthen/shorten lines on this pattern were so cool. I have never seen any type of ruler on a pattern for aid in shortening! Take a look:
So, that after all those adjustments, here is what the second muslin looked like:
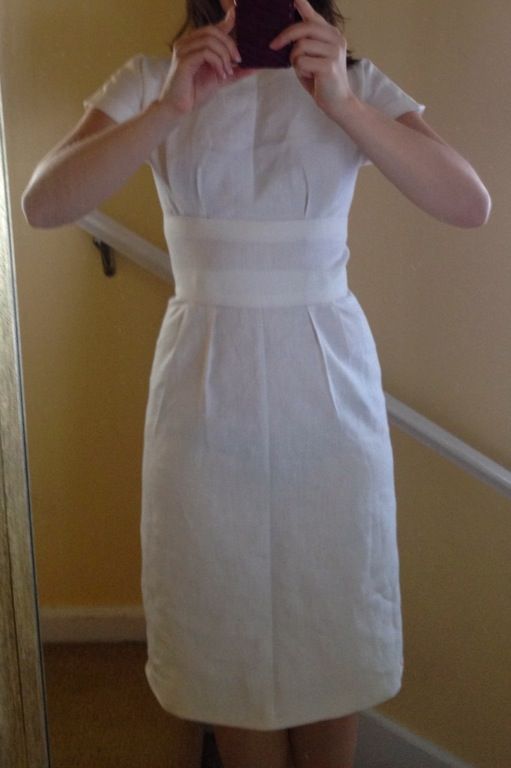
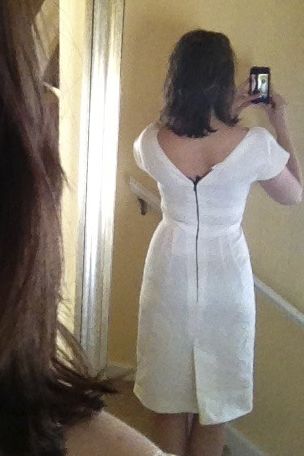
Sorry for the bad camera phone shots. But it looks way better in the back than before, right?? One other thing I want to note about this pattern. When doing all my measurements I noticed something odd. Or odd by today's pattern standards. When measuring the skirt waistline and comparing it to the pattern's finished measurements the added ease was only just over 1/2"! Which seams extremely small to me. I know they wore foundation garments, but how did that work for finding out ease in a pattern? If anyone has any idea, I am really curious.
So, stay tuned for tomorrow (fingers crossed!) for the last installment of this dress, where I show it off in all its almost perfect wool glory :)


This was very interesting - thanks for posting. The final muslin looks great - can't wait to see the real garment. I really like the boatneck style of the dress.
ReplyDeletePhew! I am glad you thought it was interesting! I was unsure if I should post all of it. At least it would be a reminder when I go to make this dress again (or something similar) what I did :) I love the neckline style, it isn't something I normally do, but I am so glad I did!
DeleteWow, this looks gorgeous! I love it!
ReplyDeleteThanks so much!
Delete