


Instructions were good. Unlike some of the Project Runway patterns, the options on this pattern are similar (basically just sleeve or embellishment changes) so there wasn't too much confusion trying to find where I should go for the next step.
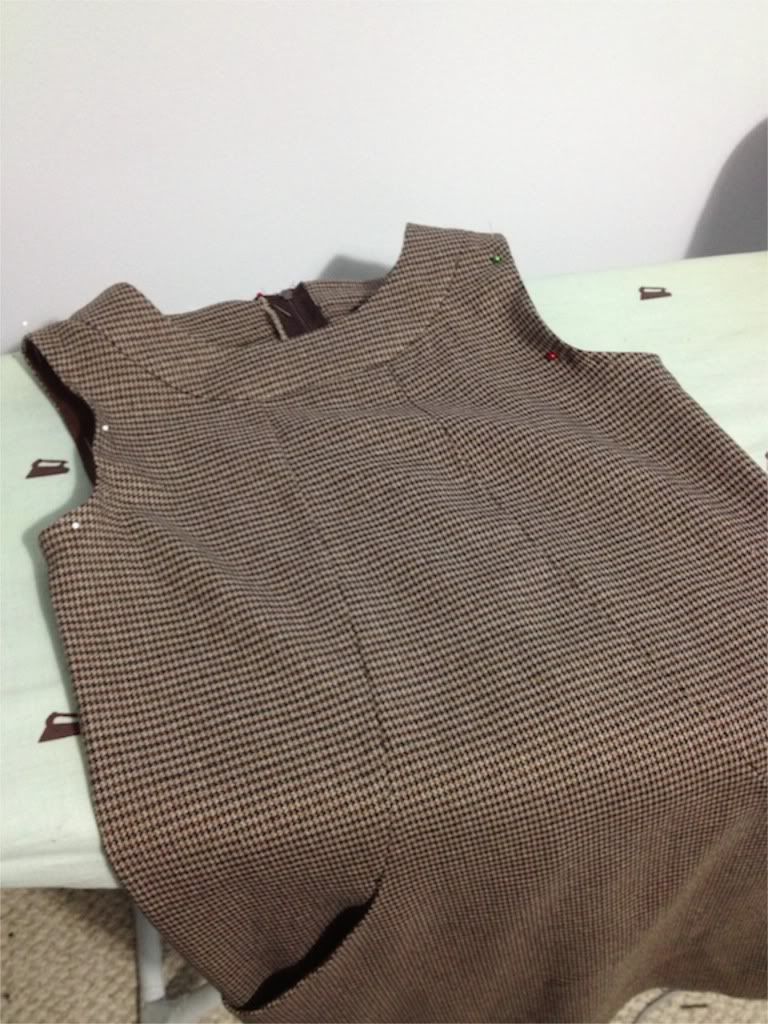
The construction itself was fairly simple. Three pieces for the front (not including pocket facings), and two for the back with a center lapped zipper. The pattern uses facings for the neckline and then bias tape for the sleeves (the sleeveless option). I was super lazy and decided that I would just use the fashion fabric for the facings and pocket lining. This decision turned out okay. The neckline is not too bulky, but if I were to do it again (and I am) I would use just a cotton broadcloth for the neckline and something silky for the pocket lining. Even though it is a poly suiting, it uber-soft, so the pockets are nice and toasty warm! I interfaced the facings with a thin fusible interfacing I bought in Rome. I would love to give more information on it but I have none. I can just tell you that it is the bomb!

Speaking of zippers. Let me just state for the record that I am bad at lapped zippers. No, that is not true, I am average at lapped zipper. I think I just don't like them. Everyone complains about invisible zips, but I have had more luck with those than lapped! Maybe I need more practice, or something. So the lapped zipper I did, begrudgingly. Also, that zipper tape is so scratchy and ugly. Any thoughts on trying to make that prettier or softer? Here is a shot of it:
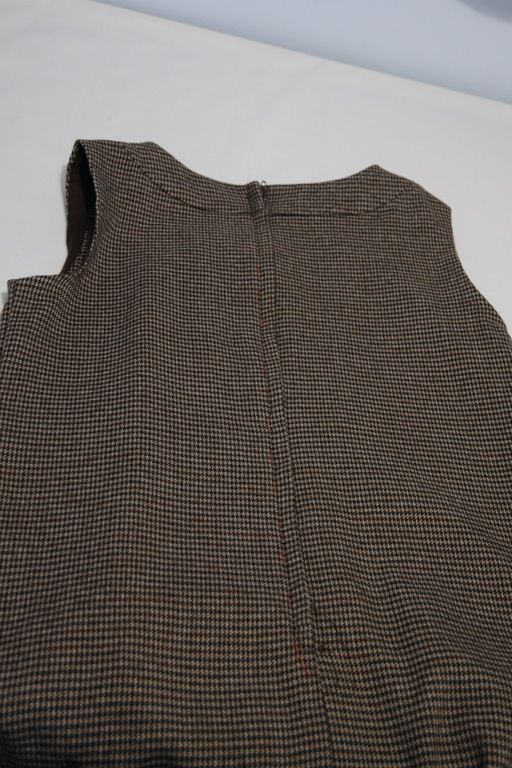
It is just basted in for fitting, hence the orange thread
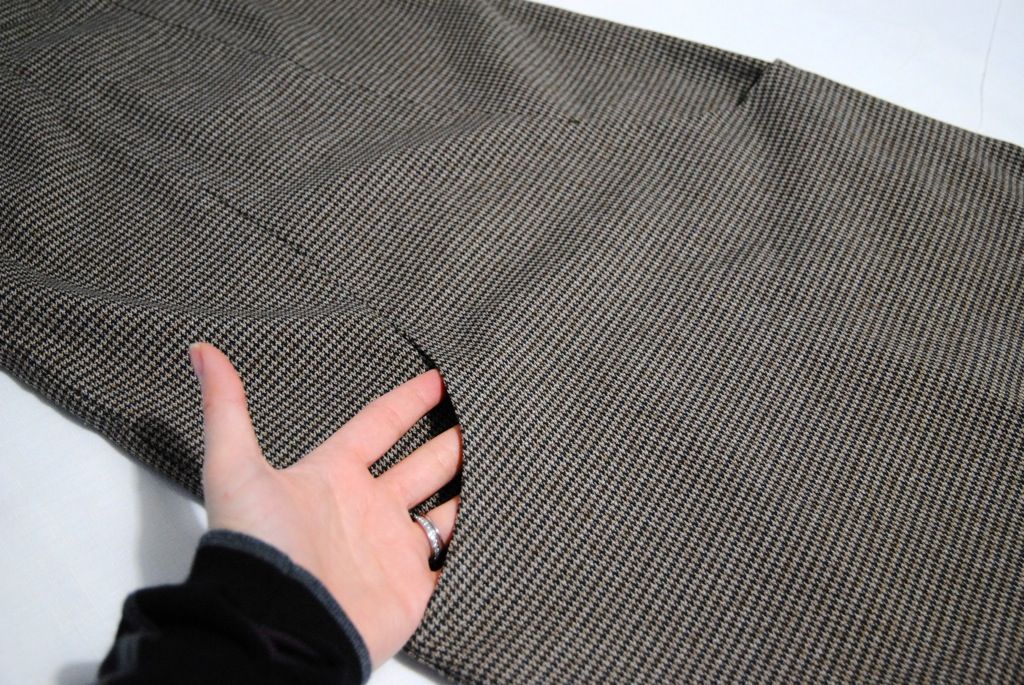
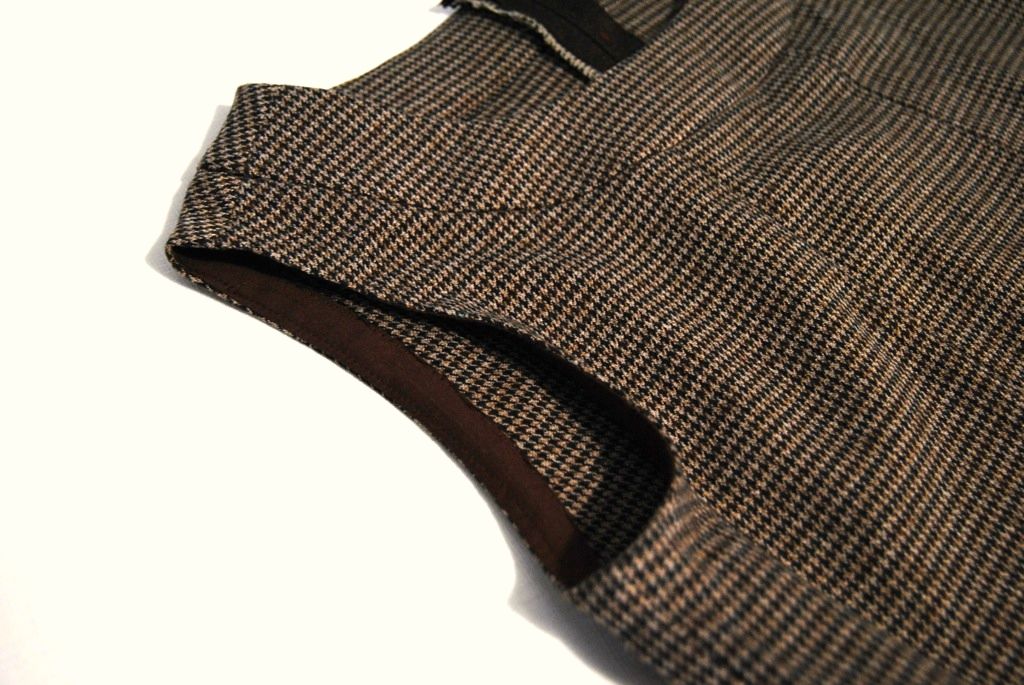
The only area that I strayed from the directions on is the sleeve finishing. As you can tell I did the sleeveless version of the dress. This calls for 1/2" single fold bias binding. It has you place the crease on the seam line. Now, I have always lined up the edge of the tape with the raw edge, and in retrospect I should have just cut the seam allowance down. Instead I awkwardly pinned it 3/8" in from the edge. Then you sew that on the right side and then fold it inside basting the edge of the tape to the wrong side of the dress. Then, it has you topstitch on the right side where you baste, which is about 1/2 from the edge. Did I lose you yet? So. This, I think is ugly. Maybe it is just me, but I thought stitching it by hand on the inside looks much more professional and RTW. Maybe they are just trying to make it easy for the home seamstress? Who knows, but I went with hand stitching.
So as I stated yesterday, when I tried it on my niece it was a size too big. This is my own fault. I took her measurements and then did nothing with them. Ha! Not very helpful. But, she will grow and it will eventually fit her. At that time I will then finish the hem and remove basting of the zipper. In the meantime, I will try to make another one. This time, I will change these things: use broadcloth for facings, invisible zipper (or maybe practice my lapped...sigh), grade down pattern, check pocket placement and possible move up. I will attempt to grade it down somewhere between a half-inch to one inch total. I think that should be enough, although this time I will *actually* consult her measurements and compare them to the pattern measurements and go from there.
All in all I really like this pattern. I think the pocket placement is too low (I have had that happen on another Project Runway jumper), but other than that and the topstitching, it is a cute and easy dress!
Ever made clothing for wee folks? Was a fun or too much time for something they will outgrow in a blink of an eye?? :)
Have a great Wednesday!


I really like this dress and the fabric too. I'm sure your niece will love it too!! As for serging - if the garment has no lining, I serge both s/a's individually and press open. As for the zipper - invisible is the way to go, but without an invisible zipper foot, it would be harder. Once I bought myself one, I never looked back!!
ReplyDeleteGood, I am so glad I am not the only one who like invisible zippers! You know, I have an invisible zipper foot and have never used it! I will have to break it out on the remake :) And thanks for the tip on the serging, it is always great to hear what other people do :)
DeleteInvisible zipper foot is the best! Give it a try :)
DeleteAre you making the vest too? The dress looks cute! Hope the next fits or she grows quick :)
ReplyDeleteThis is so cute! I love it! Your niece has great taste! I generally sew my seams first (to make sure everything fits before it's too hard to unpick things), then serge the seam allowances together. And girl-- get that invisible zipper foot going! It really makes zippers look good.
ReplyDeleteI laughed when your neice insisted on having the same fabric as the girl on the left...my daughter said the same thing when she picked out this pattern. I said she could go for any color, but nope...brown plaid, just like the girl in the picture. Thanks for posting this because I am about to start this project and it's good to read about your issues and what you would have done differently.
ReplyDelete